Signatures in Outlook can be assigned to email accounts in your profile. When each account is assigned a signature, you can change the sending account and the signature will change to the one assigned to the account. You can also right click on the signature and choose a different one.
If you are using signatures to insert boilerplate text, use Quick Parts instead. Quick Parts are on the Insert tab of the ribbon and work much like AutoText found in older versions of Word.
Always assign a signature to accounts, using the blank signature on accounts that don't need a signature. When you use an account that has no signature assigned ("<none>") you can't right click to add a signature and switching accounts won't add a signature assigned to that account.
Outlook 2010 and newer
In modern versions of Outlook, Word is used as the (only) Outlook editor. When you create a signature, three files are created, one for each message format type: .htm, .rtf, and .txt. These are stored in your Windows profile directory.
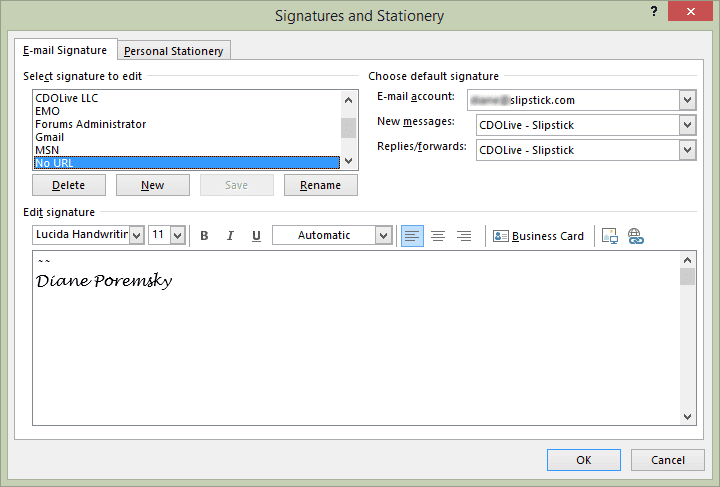
To create a new signature in Outlook:
- Open Outlook's File, Options menu.
- Select the Mail page then the Signatures button near the top.
- Create one or more signatures, including a blank signature.
- Select each account in your profile and assign a signature to it.
- Click Ok to save the settings and return to the Options dialog.
To create a new signature while composing a message, choose Signature from the Insert tab and then select Signatures... from the bottom of the menu to open the Signature and Stationery dialog.
If you have chosen to insert the signature automatically, but want to use a different signature for the current message, right-click on the signature. From the pop-up menu, select either the name of the signature you want to use or Signatures... to create a new one.
Create a blank signature named None that consists of just a character or two (like - or --), then set Outlook to always insert your normal signature automatically. If you don't want a signature on a message, right-click the automatically inserted signature, then choose None from the menu that pops up.
To add a signature when sending documents using the (File | Share | Send as Attachment) command, select a signature from the Signature button flyout. If you are using the Send to Mail recipient command (not in the ribbon by default), and using multiple accounts, switch accounts. If you have only one account in Outlook, you'll need to copy and paste the signature from Outlook.
Outlook 2007
Office 2007 is the first version where Outlook has only Word as the editor. Signatures work exactly the same in Outlook 2007 and up, however, the first step: opening Options, is on the Tools menu. The signature dialog is the same one used in Outlook 2010 and 2013, show above. It's highly recommended that you assign a signature to every account, using a blank signature on the accounts where you don't want a signature.
To create a new signature in Outlook 2007:
- Open Outlook's Tools | Options menu.
- Select the Mail Format tab then the Signatures button at the bottom of the dialog.
- Create one or more signatures, including a blank signature.
- Select each account in your profile and assign a signature to it.
- Click Ok to return to the Mail Format tab.
To create a new signature while composing a message, choose Signature from the Include chunk and select Signatures... from the flyout to open the Signature and Stationery dialog.
If you have chosen to insert the signature automatically, but want to use a different signature for the current message, right-click on the signature. From the pop-up menu, select either the name of the signature you want to use or Signatures... to create a new one.
Leave a Reply