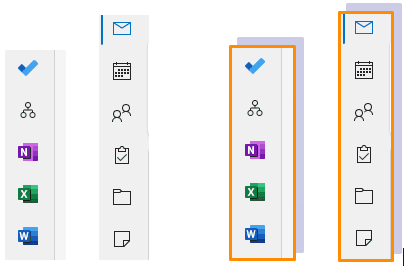
A user likes to put a border around screenshots and hoped to set an option to always add a border. While this is not an option, it is easily done using a VBA macro. This variation of the Resize Images in Email macro puts a border and shadow around all images in the message you are composing.
To change the text format, see Use Word Macro to Apply Formatting to Email.
To use: run the macro after adding the images to your message. Note: This macro formats all images in the message, including images in signatures.
Public Sub AddBorderstoImages()
Dim objItem As Object
Dim objInsp As Outlook.Inspector

' Add reference to Word library
' in VBA Editor, Tools, References
Dim objWord As Word.Application

On Error Resume Next

Dim oILShp As InlineShape

'Reference the current Outlook item
Set objItem = Application.ActiveInspector.CurrentItem
If Not objItem Is Nothing Then

If objItem.Class = olMail Then
  Set objInsp = objItem.GetInspector
    If objInsp.EditorType = olEditorWord Then
      Set objDoc = objInsp.WordEditor

    ' This applies to pictures
    For Each oILShp In objDoc.InlineShapes
    With oILShp
      With .Line
        .Visible = True
        .Style = msoLineSingle
        .ForeColor.RGB = RGB(255, 140, 0)
        .Weight = 2.25
      End With

      With .Shadow
        .Style = msoShadowStyleOuterShadow
        .Size = 100
        .Type = msoShadow2
        .Transparency = 0.8
        .ForeColor.RGB = RGB(0, 0, 128)
      End With

    End With

    Next

    End If
End If
End If

Set objItem = Nothing
Set objWord = Nothing
Set objInsp = Nothing
End Sub
How to use the macros on this page
First: You need to have macro security set to the lowest setting, Enable all macros during testing. The macros will not work with the top two options that disable all macros or unsigned macros. You could choose the option Notification for all macros, then accept it each time you restart Outlook, however, because it's somewhat hard to sneak macros into Outlook (unlike in Word and Excel), allowing all macros is safe, especially during the testing phase. You can sign the macro when it is finished and change the macro security to notify.
To check your macro security in Outlook 2010 and newer, go to File, Options, Trust Center and open Trust Center Settings, and change the Macro Settings. In Outlook 2007 and older, look at Tools, Macro Security.
After you test the macro and see that it works, you can either leave macro security set to low or sign the macro.
The macros on this page should be placed in a module.
Open the VBA Editor by pressing Alt+F11 on your keyboard.
To put the code in a module:
- Right click on Project1 and choose Insert > Module
- Copy and paste the macro into the new module.
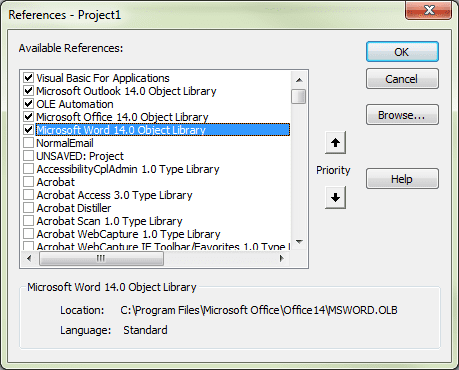
Set a reference to other Object Libraries
If you receive a "User-defined type not defined" error, you need to set a reference to another object library.
- Go to Tools, References menu.
- Locate the object library in the list and add a check mark to it. (Word and Excel object libraries version numbers will match Outlook's version number.)

More information as well as screenshots are at How to use the VBA Editor
Sherry Fox says
First, LOVE the code. I have been looking for something exactly like this. But I do have one question. How can I change the shadow? I prefer to use "Outer Offset Bottom Right. It is the first in Shadow > Outer. I just don't know the proper code
Diane Poremsky says
shadow types are here -
MsoShadowType enumeration (Office) | Microsoft Learn
Kay Sung says
Thank you Diane for the valuable code.
I am still struggle with it because the code is working in Outlook 2019, but it doesn't work in Outlook 365 even though references (in the VBA editor) settings are all same.
Any tips would be appreciated.
James Martin says
Hi Diane, you could try adding code to only apply if height in pixels is 180 or above. I have several Word macros to format image files from customers, and I have found this is the best way to discount email signatures and banners which most of the time are under this height. Cheers James Martin
Allen Hopson says
Hey Diane,
Thanks for the Outlook VBA code. Unfortunately, it returns an error. Is this something you can fix? Thanks!
Diane Poremsky says
You need to go to Tools > References (in the VBA editor) and set a reference to the Word object model.