Editing Calendar Printing Assistant templates is really easy when you use my speedy in-place modification method.
Step 1: Set permissions on the Template folder
Open the Calendar Printing Assistant template folder. On 64-bit Windows, it's at C:\Program Files (x86)\Microsoft Office\Templates, on 32-bit Windows, its at C:\Program Files\Microsoft Office\Templates.
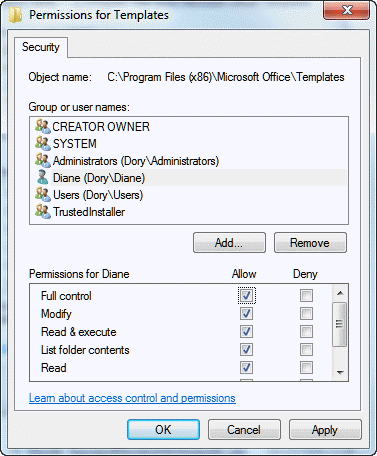
- Right click on the Templates folder and choose Properties.
- Click the Edit button
- Click Add and type your Windows username in the large text box at the bottom of the Select Users or Groups Screen and click Check Names. Your Windows user account should come up underlined with the computer (or domain) name, like this: DORY\Diane
- Click OK to return to the Permissions Dialog.

- Select your account in the top of the dialog and click Full Control in the bottom. Click Ok and close the dialog.
Now you can work with the files in this folder.
- Find the template you want to edit
- Select it
- Press Ctrl+C, V to copy and paste it
This gives you a backup copy you can restore later. This is important!
Step 2: Open the *.catx file and edit Content.XML
If you do not have WinZip or another 3rd party compression utility, download and install Winzip. I recommend using the trial, as it will give you plenty of time to edit templates. (I don't recommend the advertising-supported free version.)
If you have a third party zip-compression utility installed, it may work. Follow the steps below to see if the changes to the Content.XML file update the catx file. The Compressed folder utility that is included with Windows will not work - it won't let you write back to the zip file. While you could work in another folder and copy the file back to this folder, its easier to just edit in place using a full featured zip utility.
Once you have WinZip installed, double click on the template file. A dialog will come up telling you Windows can't open the file. Choose the second option to Select a program from the list of installed programs and choose WinZip.
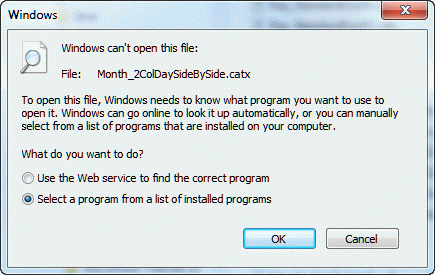
It's your choice if you want to set Winzip to always open these files.
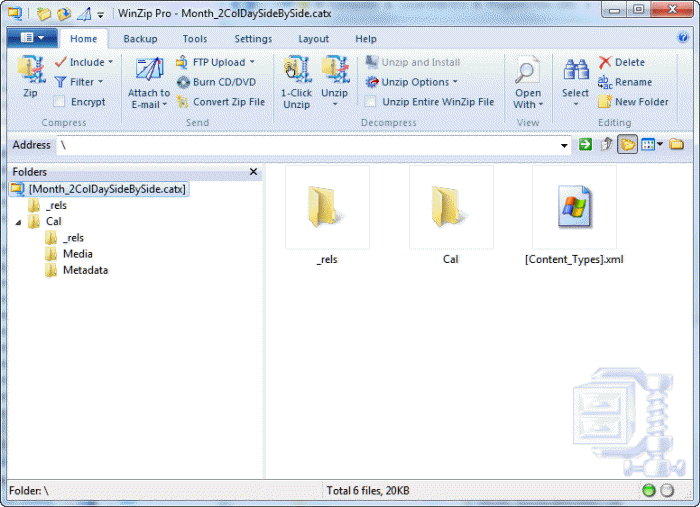
Now we're ready to edit the Content.XML file
- Browse to the Content.XML file and right click on it, choosing Open with...
- If Notepad is listed, select it; if not, choose Choose Program and find Notepad.
- Edit the XML file and Save (Ctrl+S or use the File, Save command.)
Click on the WinZip window to update the catx with the changed XML file.
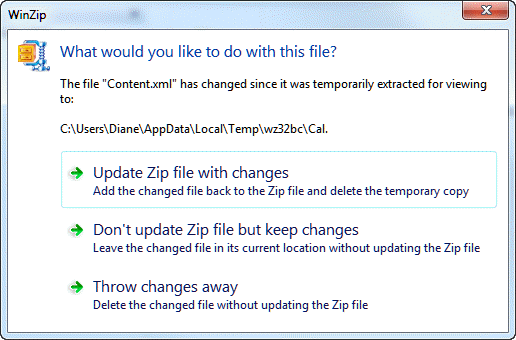
A dialog will come up asking if you want to update the zip. You want to update the zip.
Step3: Check your work in the Calendar Printing Assistant
To check your changes, go to the Calendar Printing Assistant.
You will need to refresh the view to see the changes. The easiest way is to select a different template, then select the one you edited.
Repeat the edit, save, and refresh steps as needed to edit then check your template. If you keep Content.XML open in Notepad and keep the CPAO open, editing the template is a very quick chore, giving you more time to figure which lines need edited.
GediNixa says
Hi Dianne, THANKS THANKS THANKS, your are the only person worldwide helping for this special "problem"...
But: Chaging the catx-Files: Did it like written. Made the changes in catx-Files directly by winZip and refreshed the file (no rename, no copy) but the changes have no impact in CPAO. Restarting programm as well. Refreshing no impact. I work with OL2007 SP3, German Language.
Any idea, another place, another name, another problem?
Larry Smith says
Hi Dianne
I would really like to use the weekly calendar in 2013, but would like to have text fields where the times are now.
reason being, we have a small lodge and I would like to print out the calendar with room numbers in the space to inform staff when there will be occupation in which room.
eg.
Vicky says
I follow instructions exactly and when I make changes to the day_5col.... and save it, the template no longer appears in the application (although I see it in the directory).
Tamara says
I just installed and tested the CPAO, and what I'm seeing is completely different that what is described here.
There is no Templates folder under ..\Program Files\Microsoft Office\ at all; rather, it is found at C:\Users\***\AppData\Roaming\Microsoft\Templates. But there are no .catx templates there.
A new folder was just created at
C:\Users\***\AppData\Roaming\Microsoft\CPAO\Templates -- but this folder is completely empty. In fact, a global search indicates that I have no .catx files installed anywhere.
The only other place that CPAO shows up is at
C:\Users\***\AppData\Local\Microsoft\CPAO. This folder has just three files:
documentcache.db
templatecache.db
themecache.db
This is bewildering, and extremely frustrating when all I'm trying to do is solve an inexcusable problem that shouldn't exist in the first place -- the small calendar Prior/Next month bug when printing a calendar in Outlook.
Do you have any suggestions to offer??
Diane Poremsky says
What bitness is Windows? In 32bit, the templates that were installed with CPAO are at C:\Program Files (x86)\Microsoft Office\Templates
Tamara says
64-bit Win 7 Pro, with 32-bit Office 2010.
Diane Poremsky says
The templates that ship with it should be here - C:\Program Files (x86)\Microsoft Office\Templates
Geoffrey Schaller says
Thank you for your help with this.
Have you had a chance to confirm if the flagged emails are possible, or not possible, as a part of a template?
Diane Poremsky says
I haven't been able to figure out a way to filter on flagged emails.
Geoffrey Schaller says
Understood, and thank you for your help!
Geoffrey Schaller says
I'm attempting to modify the Tri-Fold Day Letter template, so that the third column (the Week listing) is replaced with a listing of flagged emails instead. I've got it so that the Tasks list appears twice, side-by-side (C&P the Tasks part of the XML, change column from 3 to 5), but I can't find how to modify the 2nd Task list to show flagged emails instead of Tasks. Can you provide guidance?
Thank you!
Diane Poremsky says
I'm not sure that you can. I won't have a chance to look at it before the weekend.
njdowell857 says
Which version of Outlook? I have not found a way to make CPAO work with Office 2010 64 bit and Microsoft has been pretty clear they will not release a working version of CPAO for 64-bit Outlook 2010. Thanks!
Diane Poremsky says
Correct, it only works with 32bit Outlook.