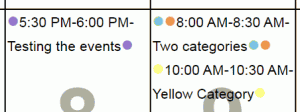
Remove location field from appointments
Jason wanted to know how to remove the Location field on meetings is not displayed.
To remove the location from the printed calendar, you need to remove (or comment out) two lines in the content.xml code:
<ContentElement Source="Location" />
<CompactList Padding="2" Orientation="Fill" FontSize="8pt" TypeFilter="AppointmentsTasks"/>
and in place of the CompactList line, add the sources:
<LIST Orientation="Fill" FontSize="8pt" TypeFilter="AppointmentsTasks" RowSize="14" MaxRowWrap="5" ShowEmptyRow="true">
    <COLUMNS>
       <COLUMN Bottom="2" Right="1" Top="2" Left="1" ShowDuplicates="True" Width="*">
         <SOURCES>
           <SOURCE Name="CalendarIcon" />
           <SOURCE Name="StartTime" StartSeparator="" Format="t" />
           <SOURCE Name="EndTime" StartSeparator="-" Format="t" />
           <SOURCE Name="Subject" StartSeparator=": " />
         </SOURCES>
      </COLUMN>
    </COLUMNS>
</LIST
You'll use this method if you want to change the separators used in the printout or add or remove other fields. Valid sources you can use include the following.
<Source Name="CategorySymbols"/>
<Source Name="StartTime" Format="t" StartSeparator=""/>
<Source Name="EndTime" Format="t" StartSeparator="-"/>
<Source Name="Subject" StartSeparator=": "/>
<Source Name="Location" StartSeparator=" (" EndSeparator=")"/>
 You can also use this method if you want to "wrap" appointments with a category symbol. Use the CategorySymbols source line as the first and last line of the list.
Control how many all day events are visible
 The default for all day events is 3. You can change this by adjusting the SpanningAllDayArea MaxSize. You need to use multiples (+5) of the AllDayAppointment height, which is 16 by default. You can squeeze more in by reducing the AllDayAppointment size and the margins (the numbers go clockwise starting at the top: top, right, bottom, left).
 <SpanningAllDayArea MinSize="0" MaxSize="53" IsUniform="false" Margin="2">
 <AllDayAppointment Height="16" Margin="2,1,2,0" Style="SingleAppointment">
The screenshot shows two dates: one with 5 all day events, with only the MaxSize changed and the second date has a AllDayAppointment height of 15 and margins of 1,1,1,0 too.
Save an edited Template using a new name
To save an edited template file using a new name, you need to change the name in the metadata.xml file and in the content.xml file you edited.
In the Content.xml, change the name at the top of the page:
<!-- Standard Month 03 - Custom -->
In the metadata.xml file, change the name field to the same name as in the calendar template:
<Name>Standard Month 03 - Custom</Name>
and increment the template id field by adding a number before or after the original ID. Always use the same number with the templates you create.
<TemplateId>2145</TemplateId>
More Information
- Calendar Printing Assistant Shows Duplicate Entries
- Calendar Printing Assistant: Week Starts on Sunday or Monday
- How to Email Calendar Printing Assistant Calendars
- Modify Calendar Printing Assistant Templates
- My Speedy CPAO Modification Method
- Printing a Calendar Legend
- Using and Editing the My Outlook Calendar Template