Most people are familiar with each user in an organization having their own individual mailbox but what you may not be aware of is that resources, such as rooms, can also have their own mailboxes. What benefit does that provide? It allows the Room calendar, which is part of the mailbox, to be used to allocate usage, such as for scheduling meetings in these rooms and this can be managed automatically.
Here's how you go about setting up a room mailbox using Office 365.
First, you'll need to login to the Office 365 web portal as an administrator who has rights to create mailboxes. You will then need to navigate to the Exchange admin center.
Once at the Exchange Admin center you need to select recipients from the menu on the left hand side and then resources from the menu that appears across the top.
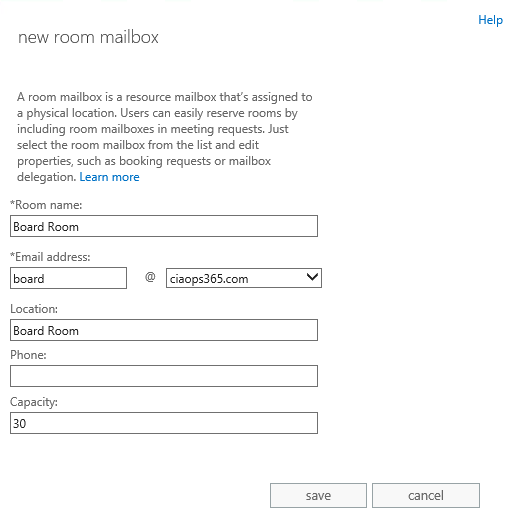
You then select the down arrow next to the + (plus) key, just under the menu options, at the top of the screen. When you do so a number of items should appear as a drop down as shown above. From this list select Room Mailbox.

You'll now be asked to provide some details about the new Room mailbox, including the name and the email address. Good practice is to ensure these match the resource (i.e. room name or location) as closely as possible to make it more intuitive for users. Complete all the details and when complete, select the save button at the bottom of the window.
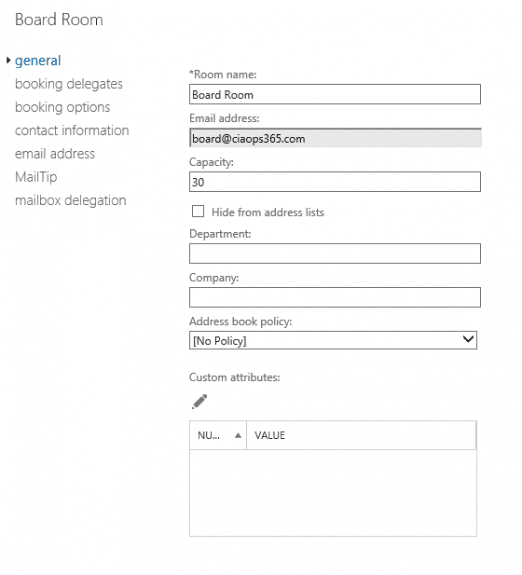
Once the Room mailbox has been created you can select it from the list and edit more of its properties. You do this by selecting the mailbox and clicking the pen item (edit) on the menu.
Once you start editing a Room mailbox you will see a list of menu items on the left hand side that you can select to navigate to different options for the mailbox.
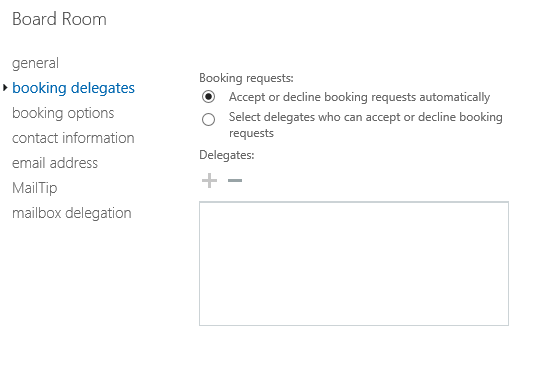
Under the booking delegates option you'll see that you have the option to automatically accept or decline booking requests. This means that if the time requested is available (or free) it will automatically be booked. However, you can also elect to delegate certain users to approve such requests manually if you choose. The default option for a mailbox is to handle booking requests automatically.
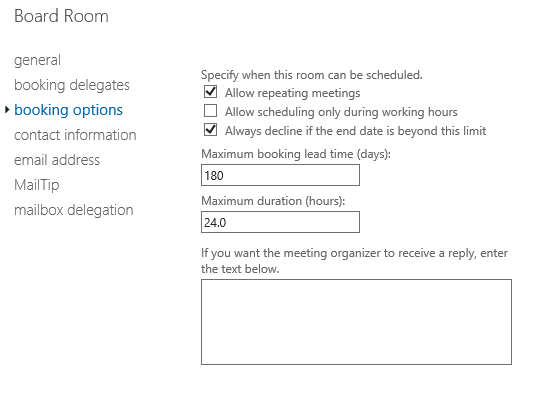
There are further settings under booking options as shown above that you can configure.
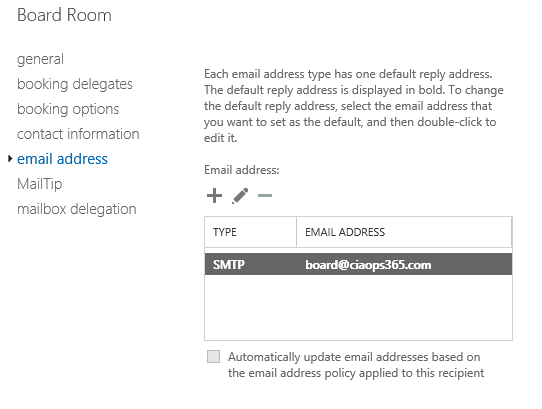
You can also modify or add to the existing email address for the room if desired. This can be completed using the email address option on the left hand side.
Once you have completed any customizations, save the changes.
The Room mailbox is now available to all users. To view the Room calendar they need to select the Open Calendar option from their Outlook Calendar area, then from the menu that appears, select From Room list as seen in the screenshot.
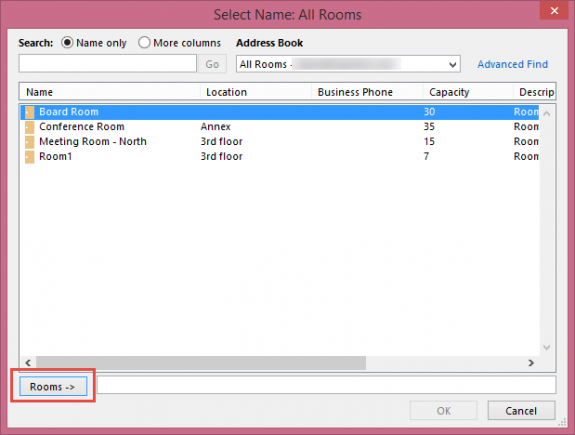
This should then display all the Room mailboxes that have been configured. Simply select the correct one(s) and then the OK button to save.
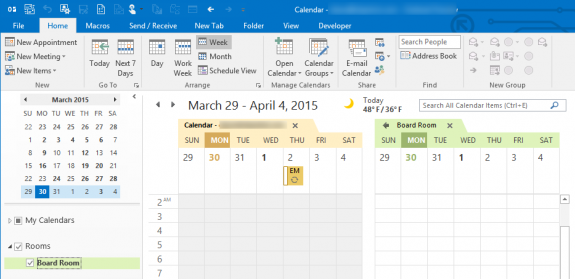
Outlook should now display the calendars side by side as shown above. Items can now easily be dragged and dropped between displayed calendars.
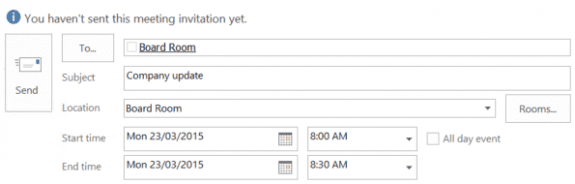
To book a room, just compose an appointment as you would normally but also include the Room mailbox email address in the appointment. Complete all the details, including the desired time and Send the email to complete the request.
If the option is configured to allow automatic approvals and the time requested is available, you should receive an acceptance email confirming the booking like that shown above.

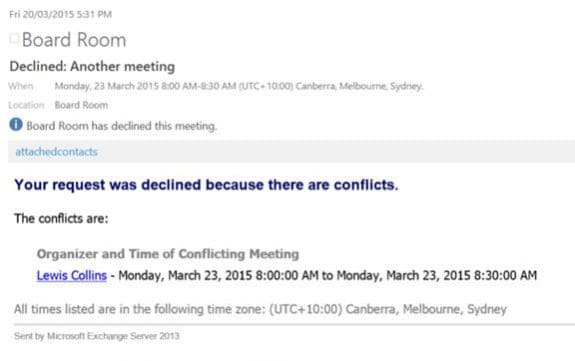
If the meeting is declined, you will receive an email stating that your meeting request overlaps another and it will show you the duration of the meeting taking place at that time.
Using Room mailboxes is a smart way to schedule shared spaces in your business. Having them automatically approved or rejected makes booking simple and reduces overheads. You can create as many Room mailboxes as you require as they don’t consume a license. Once you do so, you should never ever be double booked again.
Alex Jordan says
Admin thanks for sharing detailed information with us. I would like to share with you and your audience about DeskFlex. it is a Meeting Room Scheduling Software with advanced features. it provides a very simple interface anyone can use very easily. with it you can book meeting rooms, manage office space, schedule meetings, events, and much more. the best thing is about DeskFlex you can use it for free for 30 days.
westerdaled says
Really good post. I am looking at the requirements for common online room booking system for rooms in various sites. I would like to add further metadata to this such as address ( street, post / zip code) plus available equipment e.g. Flipchart . Can these be easily added ?