It is possible to create a template and choose one of your accounts as the sending account.
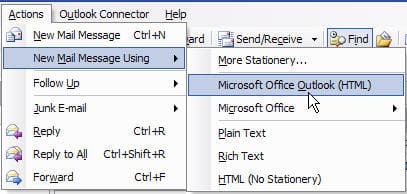
- Begin by opening an Outlook form. If you use Word as your editor, you'll need to open an Outlook form using Actions, New Mail Using, Microsoft Office Outlook (HTML) or disable Word as the editor in Tools, Options, Mail Format and re-enable it after you save the template.

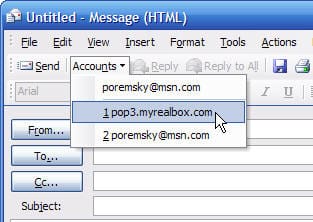
- Select the Account as usual.
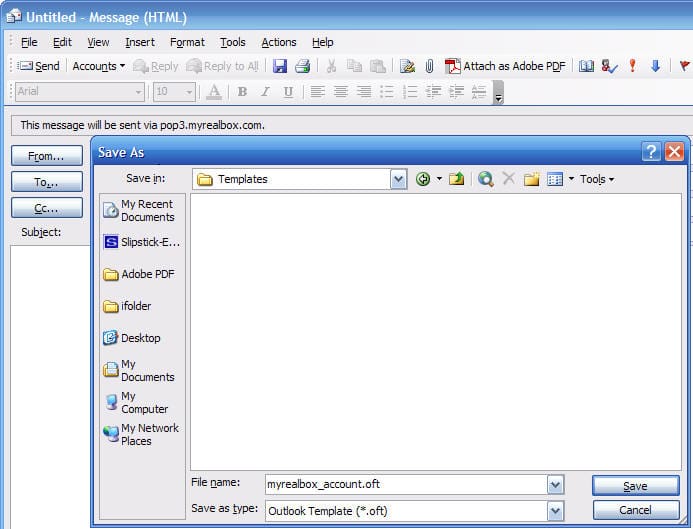
- Go to File, Save as menu and save it as an template (*.oft). By default, Outlook puts it in the Template folder, you may want to save it in My Documents or another location.
- Close the email form (click No when asked to save it).
At this point, the template is ready to use.
Note: the following steps apply only to older versions of Outlook. Outlook 2007 and Outlook 2010 do not allow templates to be associated with toolbar buttons. In Outlook 2007, you need to open the template using the Forms menu, publish it to a folder, or copy it to an Outlook folder. See Tip 525: Using Templates
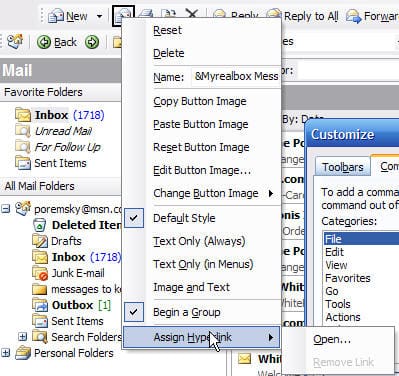
- Go to Outlook's View menu and select Toolbars, Customize.
- Select the Commands tab and drag the Mail Message command to any toolbar or menu and then drop it.
- Right click on the button you added and type a name in the Name field, change the Default style to Text, if desired, and change the Button image, if desired.
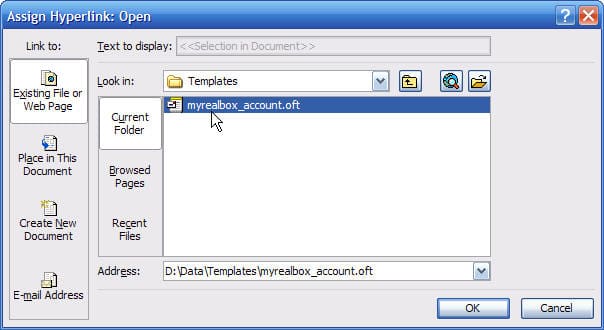
- Finally, select Assign Hyperlink, then Open.
- Browse to the location where you saved the template and select it.
- Close the Customize dialog and click on the button you just added. Verify the correct account is selected, send a test message to your other account to verify it works.

More Information
When you select an account in a template, it uses the Account name to identify the selected account. If you remove the account or change the account name, the template will use the default sending account.


Apart from my inbox, I have my team's inbox configured in my Outlook. I am trying to create and save a template with my team’s email address in the ‘From’ field. Every time I save the Outlook Form (template), From address changes back to my email address. Is there any way to fix this?
is the team mailbox added an account or just open in the profile? It's been awhile since i tested this - with the changes in how outlook now handles multiple accounts, it won't work unless as outlook defaults to the account assigned to the current folder. You could use a macro or possibly a script to set the from address.
In previous versions of outlook (2016 and prior) this worked. From office 365 ver of outlook, this is no longer possible. Among a myriad of downgrades, this is the service you get for purchasing a monthly software form a company that does not wish to help you, for a fee.
My recommendation is to "upgrade" to Office 2016 to regain that, and many other functionalities.
In this case you could save the oft with the from field already set to the shared mailbox and save the oft in a folder in the shared mailbox (like templates) and then double click to open the template already with the field configured for the shared mailbox.
From now on M$ wants you to manually click that field every time. it's supposed to be helping you.