A user wanted to know how to export a list of distribution group members. He specifically wanted the alias and primary smtp address.
Exchange online admins can export the members in Azure Active Directory portal.
Log into The Azure portal and under All Services, select Groups.
Select the distribution group you want to export. Under Bulk Operations, select Download members. The values shown on the screen are downloaded.

The drawback: you need to export one distribution group at a time and the fields you see are what you get. Basically, name and email address only.
The methods on this page require Exchange admin access. If you need to export the distribution group from Outlook, see Use VBA to Create a List of Exchange GAL Members for a VBA version.
PowerShell will allow you to export one or more lists and get any field available in the GAL entry.
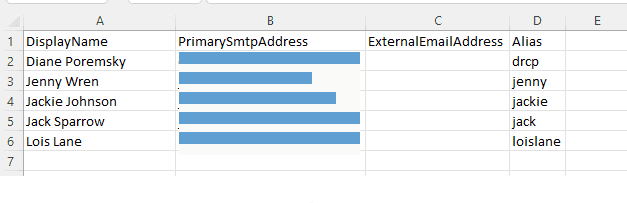
This PowerShell creates a CSV file for every DL in the organization, containing each member's name, email address, and alias.
If you need more fields, add them to this line in the code. (A list of available field names is below.)
Get-DistributionGroupMember -Identity $DL | Select-Object DisplayName, PrimarySmtpAddress, ExternalEmailAddress, Alias | Export-Csv -Path $exportfile
$DGs = Get-DistributionGroup
 # export every DL
 foreach ($DLList in $DGs)
    {
 $DL = $DLList.DisplayName

 # get distro list
 Get-DistributionGroup -Identity $DL

 # Save as csv in the user's documents directory
 $exportfile = $HOME + '\Documents\' + $DL + '_Members.csv'

 # get the members & select columns, export to a csv file
 Get-DistributionGroupMember -Identity $DL | Select-Object DisplayName, PrimarySmtpAddress, ExternalEmailAddress, Alias | Export-Csv -Path $exportfile

    }

If you only need the members of one distribution group, this PowerShell exports each member's name, email address, and alias in a specific distribution group to a CSV file. You can add the group name in the code or type it in when you run the PowerShell.
clear
$NF =""

# Add the DL name to the code or enter it when you run the script
# DL names are not case sensitive
#$DL = "testgroup"
$DL = Read-Host "Enter the DL name"

write-host $DL
# check to see if list exists
try{Get-DistributionGroup -Identity $DL} catch{$NF="Distribution List Not Found"}

# if the name of the distribution group was entered correctly then $NF will still be null
if($NF -eq "")
 {
 # Save the distribution member details as csv in the user's documents directory
 $exportfile = $HOME + '\Documents\' + $DL + '_Members.csv'

 # get the members but only select certain columns - export the results to a csv file
 Get-DistributionGroupMember -Identity $DL | Select-Object DisplayName, PrimarySmtpAddress, ExternalEmailAddress, Alias | Export-Csv -Path $exportfile
}

Else
{
Write-host "Check your spelling, the DL was not found"
}
This table lists the fields that would contain data you might want to include in the export. See ExchangeUser members for the complete list.
| Field name | Description |
|---|---|
| Address | The X400 e-mail address of the Exchange User |
| AddressEntryUserType | Returns olExchangeUserAddressEntry which represents the user type of the ExchangeUser |
| Alias | The user's alias |
| AssistantName | Name of the user's assistant |
| BusinessTelephoneNumber | Business telephone number |
| City | City |
| Comments | Comments in the GAL entry |
| CompanyName | The name in the Company field |
| Department | The department field |
| DisplayType | Returns olUser from the OlDisplayType representing the nature of the ExchangeUser |
| FirstName | The user's first name |
| JobTitle | The job title of the user |
| LastName | The last name of the ExchangeUser |
| MobileTelephoneNumber | The mobile telephone number |
| Name | Returns the display name for the ExchangeUser object |
| OfficeLocation | The office location field |
| PostalCode | Postal code |
| PrimarySmtpAddress | The primary Simple Mail Transfer Protocol (SMTP) address |
| StateOrProvince | State or province |
| StreetAddress | Street address |
Using PowerShell Scripts
To use PowerShell scripts with Exchange online, start typing powershell on the start menu and open Windows PowerShell when it comes up. You need to choose Run as Administrator. (Windows PowerShell ISE has a scriipt pane at the top, which is useful if you want to edit the script. )
You'll need to load the ExchangeOnlineManagement using before using the script. Type or paste these two lines in the PwerShell (in Administrator mode).
Import-Module ExchangeOnlineManagement
Connect-ExchangeOnline -UserPrincipalName [email adddress or alias]
Paste the entire script in the PowerShell window and press Enter or the Run button if using PowerShell ISE.
Saving PowerShell Scripts
If you want to save the script as a .ps1 file, paste it into Notepad and save it with the extension .ps1. To open it in the PowerShell IDE, type powershell on the start menu and click on Windows PowerShell IDE when the PowerShell app is found. Paste the script in the editing window.
To use it, you need to allow local scripts by running this command:
Set-ExecutionPolicy RemoteSigned
To run your saved .ps1 file, right-click on the script and choose Run with PowerShell.
Anders L says
How can i define, so it only takes a specific OU and not all the Distribution groups?