Use this method to create a new *.pst in your profile.
While there are several ways to add a new *.pst file to your profile, you need to use this method when Outlook won't open because the *.pst is corrupt. You should also use this method when you are going to use the new *.pst file as your default data file.
- Open the Control Panel, Mail applet
- Click Data File button.
- On the Data File tab, click Add
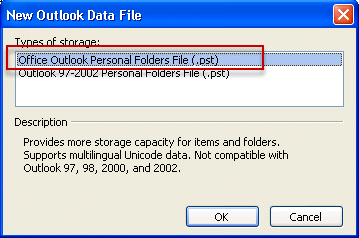
- Choose the .*pst format listed first. This creates an Unicode pst.
- Enter a display name for your data file (.pst)
- Click the Set as Default button to set it as default.
- Close the dialogs and start Outlook.
Move any data you need daily or will need in the future to the new pst. Do this by switching to a folder list view, such as All appointments or By Category, select all and move or drag to the new folder.
You can drag folders you created to the new pst file - this will move the folder and it's contents, including any subfolders.
You can keep the old pst as a Archive, you can close it to remove from the profile if you don't need frequent access to the data (weekly or less).
To close: right click on the pst name and choose Close from the menu.
If you have more than one profile, click the Show Profiles button, select the profile you want to edit and click Properties, then Data File.
Other ways to create a new pst file
Other methods you can use to add a new pst file to your profile include using the Account settings dialog or Data File Management within Outlook.
In Outlook 2010, go to File, Account Settings, Data file tab and click Add.
In Outlook 2007, use the Tools, Account Settings, Data file tab or the File, Data file management command.
In older versions of Outlook, use the File, Data File Management command (when present) or Tools, Accounts (Tools, Services in some versions).