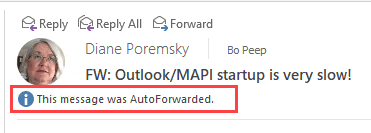
A user wanted to know how to identify or "do something" with a message that was auto forwarded. While the info bar in the message identified it as auto forwarded, it' only visible when the message is selected.
The first macro is an ItemAdd macro and runs as items are added to a folder. In this example, we add a category to the message, but you can save, move, or delete it instead.
The second macro on this page is used in a run a script rule.
Option Explicit
Private objNS As Outlook.NameSpace
Private WithEvents objItems As Outlook.Items

Private Sub Application_Startup()

Dim objWatchFolder As Outlook.Folder
Set objNS = Application.GetNamespace("MAPI")

'Set the folder and items to watch:
Set objWatchFolder = objNS.GetDefaultFolder(olFolderInbox)
Set objItems = objWatchFolder.Items

Set objWatchFolder = Nothing
End Sub

Private Sub objItems_ItemAdd(ByVal Item As Object)
Dim propertyAccessor As Outlook.propertyAccessor
Set propertyAccessor = Item.propertyAccessor

 'http://schemas.microsoft.com/mapi/proptag/0x0005000B
 ' PR_AUTO_FORWARDED
Dim prop
prop = propertyAccessor.GetProperty("http://schemas.microsoft.com/mapi/proptag/0x0005000B")
Debug.Print "PR_AUTO_FORWARDED", prop
If prop = True Then
Item.Categories = "AutoForwarded"
Item.Save
End If
Set Item = Nothing
End Sub
Run a script rule version.
You can use this is a run a script rule.
Private Sub AutoForwarded(ByVal Item As Object)
Dim propertyAccessor As Outlook.propertyAccessor
Set propertyAccessor = Item.propertyAccessor

 'http://schemas.microsoft.com/mapi/proptag/0x0005000B
 ' PR_AUTO_FORWARDED
Dim prop
prop = propertyAccessor.GetProperty("http://schemas.microsoft.com/mapi/proptag/0x0005000B")
Debug.Print "PR_AUTO_FORWARDED", prop
If prop = True Then
Item.Categories = "AutoForwarded"
Item.Save
End If
Set Item = Nothing
End Sub
How to use the macros on this page
First: You need to have macro security set to the lowest setting, Enable all macros during testing. The macros will not work with the top two options that disable all macros or unsigned macros. You could choose the option Notification for all macros, then accept it each time you restart Outlook, however, because it's somewhat hard to sneak macros into Outlook (unlike in Word and Excel), allowing all macros is safe, especially during the testing phase. You can sign the macro when it is finished and change the macro security to notify.
To check your macro security in Outlook 2010 and newer, go to File, Options, Trust Center and open Trust Center Settings, and change the Macro Settings. In Outlook 2007 and older, look at Tools, Macro Security.
After you test the macro and see that it works, you can either leave macro security set to low or sign the macro.
Macros that run when Outlook starts or automatically need to be in ThisOutlookSession, all other macros should be put in a module, but most will also work if placed in ThisOutlookSession. (It's generally recommended to keep only the automatic macros in ThisOutlookSession and use modules for all other macros.) The instructions are below.
The macros on this page need to go into ThisOutlookSession.
Open the VBA Editor by pressing Alt+F11 on your keyboard.
To put the macro code in ThisOutlookSession:
- Expand Project1 and double click on ThisOutlookSession.
- Copy then paste the macro into ThisOutlookSession. (Click within the code, Select All using Ctrl+A, Ctrl+C to copy, Ctrl+V to paste.)
More information as well as screenshots are at How to use the VBA Editor
More Information
For more Run-a-script code samples, see Run a Script Rule Index